
&brandShortName; Mail & Newsgroups lets you conveniently manage all your Internet communications from one place. You can set up and maintain multiple business and personal mail accounts and Internet newsgroups, all from one window — the Mail & Newsgroups window.
To start using &brandShortName; Mail & Newsgroups:
|
|
| Mail & Newsgroups icon | |
To set up a mail or newsgroup account, first open the Window menu and choose Mail & Newsgroups. If you haven't already set up an account, the Account Wizard appears automatically, enabling you to set up an account.
The Account Wizard guides you through the process of creating a new account. If you don't know a setting, click Cancel and ask your Internet service provider (ISP) or help desk.
If an account already exists, the Account Wizard doesn't appear automatically when the Mail window opens. Instead, after opening the Mail window, open the File menu and choose New, then Account. For more details, see Setting Up Additional Mail & News Accounts.
Before you set up a mail account, your ISP or email provider should give you the following information:
Before you set up a newsgroup account, your ISP or email provider should give you the following information:
To set up a new mail or newsgroup account, begin from the Mail window:
The information requested by the Account Wizard depends on the type of new account you specify in its first window. The boldface headings that follow correspond to the windows you'll see when you're setting up an ISP or email provider account.
Use Global Inboxbox. Mail for this account will then be stored in your Local Folders. Otherwise, if the checkbox is unchecked, mail will be stored in its own directory.
Note: You need to specify only one outgoing mail server (SMTP), even if you have several mail accounts. The name of your SMTP host may not have been explicitly listed in the account setup information provided to you. For example, your SMTP host may be the same as your POP or IMAP host. If in doubt, contact your ISP or system administrator.
You are now ready to get messages from your account. &brandShortName; Mail & Newsgroups will prompt you for your password when you retrieve mail for the first time every session. For detailed instructions on how to retrieve mail, see Getting New Messages.
[Return to beginning of section]
You use the Account Settings dialog box to add a new account or to change information for an existing account, including:
To add a new account or change settings for an existing account, begin from the Mail window:
The default account is the one that you want to log into and (for IMAP accounts only) automatically check for new messages when you start Mail & Newsgroups. (For POP accounts, you must always click the Get Msg button to get new messages.)
[Return to beginning of section]
To view or change information for an existing mail or newsgroup account, begin from the Mail window:
Important: If you need to change the server type (for example, from POP to IMAP) you must first remove the existing account. Next, you must exit &brandShortName; and restart it. You can then reopen the Mail & Newsgroups Account Settings dialog box and recreate an account with the new server type by clicking Add Account.
[Return to beginning of section]
For an IMAP account, you can retrieve new messages automatically and display them in the Inbox by opening Mail & Newsgroups and selecting the Inbox for the IMAP account.
For a POP account, you must select the Inbox and click Get Msgs to retrieve your messages. By default, messages from your POP account are downloaded in full and deleted from the POP server when you retrieve them. You can change your POP server settings to retrieve just the headers and/or store a copy of messages on the server in addition to downloading them to your computer.
You can also set up Mail & Newsgroups to get new messages at startup and to check for new messages at timed intervals.
|
|
| Mail & Newsgroups icon | |
The Mail & Newsgroups icon on the status bar displays a green arrow to notify you when new messages have arrived.
 |
|
| New mail notification | |
To set up a mail account to automatically check for new messages, begin from the Mail window:
Automatically download any new messages.
To set up &brandShortName; Mail & Newsgroups to play a sound or display an alert when new mail arrives, see Mail & Newsgroups Preferences - Notifications.
You can always retrieve messages manually at any time. To get new messages for the selected account or newsgroup, do one of the following:
To get new messages for all your mail accounts, begin from the Mail window:
If you are not currently logged into one of your mail accounts, Mail & Newsgroups first prompts you to enter your user name and password before retrieving new messages for that account. (If you have already stored your user name and password using the Password Manager, Mail & Newsgroups doesn't prompt you for this information.)
Note: You can also open the File menu (in the Mail window)
and choose Get New Messages for
.
To get new messages for a specific mail account, begin from the Mail window:
Note: Mail & Newsgroups prompts you for your password the first time you retrieve messages for an account. You can choose to have Mail & Newsgroups store your password in the Password Manager at that time.
Password Manager can save all your user names and passwords on your own computer and enter them for you automatically. For more information, see Using the Password Manager.
[Return to beginning of section]
You can customize the layout of the Mail window (the window you see when you choose Mail & Newsgroups from the Window menu):
[Return to beginning of section]
To sort messages by categories such as subject, sender, date, or priority, begin from the Mail window:
To reorder column headings, begin from the Mail window:
To change which columns are displayed, begin from the Mail window:
 and select the column to be added/removed from the list.
To group messages by threading (subject), so each message is grouped with all its responses:
 |
|
| Thread button | |
Tip: The thread button automatically sorts the threads by the age of their parent messages. If you want to use another sort criterion for the threads, open the View menu and select the desired option from the Sort by submenu.
Tip: Select Preserve threading when sorting messages
in the Mail & Newsgroups Preferences
if you want &brandShortName; to preserve the threaded message grouping when
sorting messages with column header clicks. The thread button just toggles
between threaded and unthreaded message grouping in this mode. If Preserve
threading when sorting messages
is not selected, &brandShortName;
automatically displays the messages unthreaded when you sort them by clicking
on a column header.
Tip: To help you identify unread messages in a collapsed thread where you've read the parent message, &brandShortName; Mail & Newsgroups underlines the parent message.
[Return to beginning of section]
To save a mail message as a plain-text, HTML, or Outlook Express file:
Save as type, choose a file type (HTML, Text, or Mail file). Choose Mail file if you want to save the message so it can be opened by Microsoft Outlook or Outlook Express.
To print a selected message:
[Return to beginning of section]
By default, images and other content, that is hosted remotely, will not display in messages you receive, except from senders in your address books whom you have allowed. To change these settings:
Block images and other content from remote sources.
Note: See Allow remote images in HTML mail
in
Creating a New Address Book
Card for details of how to change which senders can show remote
content.
By default, JavaScript and plug-ins are not enabled for mail messages you receive. To change these settings:
Enable JavaScript for, check
Mail & Newsgroupsto enable JavaScript.
Enable Plug-ins for, check
Mail & Newsgroupsto enable plug-ins.
[Return to beginning of section]
You can address, compose, reply to, or send a new message by doing one of the following:
Tip: Use the Mail & Newsgroups Account Settings - Composition & Addressing dialog box to specify the HTML text editor to use for composing messages sent from this account. (You can specify a different editor for each of your accounts.) See Changing the Settings for an Account for more information.
Composing messages in HTML format allows you to use different fonts, text styles (such as bold or italic) and text colors, tables, numbered or bulleted lists, and pictures in your messages. However, some recipients may only be able to read messages composed in plain text format. If you want to use the plain-text editor occasionally, you can hold down the Shift key while clicking the Compose or the Reply button to use the plain-text editor on an as-needed basis.
[Return to beginning of section]
Use the Compose window to address, compose, and send mail and newsgroup messages. First specify whether you want to compose messages in plain text or HTML by default in the Composition & Addressing Preferences panel (open the Edit menu and choose Mail & Newsgroups Account Settings).
To view the Compose window, click the Compose button on the Mail toolbar.
The Compose window contains the following:
You can click the following buttons:
If you've chosen to compose messages using the HTML editor, you see an additional toolbar with text formatting buttons similar to those in &brandShortName; Composer.
For help using the HTML editor, see Formatting Your Web Pages.
[Return to beginning of section]
To address a mail message:
If you have address autocompletion enabled (it's enabled by default), type the first few letters of the recipient's name and wait for Mail & Newsgroups to complete the address. (Or you can type part of the name and immediately press ReturnEnter to have Mail & Newsgroups try to complete the address.)
Note: Use a comma to separate multiple addresses on the same line. Do not use a comma to separate first or last names. For example, multiple entries might be:
user1@netscape.net,user2@netscape.net
Fromfield to select the account you want. See Changing the Account From Which a Message is Sent for more information.
Toto choose a different recipient type:
Tip: You can quickly address a message by clicking the email address contained in a message you're reading, and then selecting Compose Mail To from the pop-up menu.
Changing the Account From Which a Message is Sent
If you have multiple mail accounts, the account listed in the From field is based on the account (or server) you selected when you choose to create a new message. However, &brandShortName; Mail & Newsgroups also allows you to change the account a message is sent from while you're composing a message. Click the From field to view a list of your accounts and then select the account you want. A copy of the message is saved in the Sent folder of the account where you sent the message from.
About Address Autocompletion
Address autocompletion allows you to address mail easily from the Compose window without having to search for names or type complete names. Mail & Newsgroups automatically checks your address books and an LDAP directory server (if available) and completes the name if it finds a unique match. It also prevents mistakes by showing all possible choices with additional information if it finds multiple matches. Address autocompletion is enabled by default.
If you don't want to use an address that Mail & Newsgroups provides, press Backspace or Delete to remove characters and then enter an alternate address.
To disable address autocompletion:
Local Address Booksand
Directory Server.
[Return to beginning of section]
While you're composing a message, you can select these additional message sending options from the Options menu:
Auto-Detect, Mail & Newsgroups prompts you for the format to use if it's unknown whether the recipient's mail program can display an HTML message. The format you choose here overrides the send format you specified using the Preferences command on the &brandShortName; Edit menu.
An additional message formatting option is available from the Edit menu:
You use the Mail & Newsgroups Account Settings command on the Edit
menu to specify that you want to use the plain-text editor for composing
messages. Select the Composition & Addressing panel of the account
and uncheck Compose messages in HTML format
to use the plain-text
editor for all messages. If you only want to use the plain-text editor
occasionally, you can hold down the Shift key while clicking the Compose
or the Reply button to use the plain-text editor on an as-needed
basis.
[Return to beginning of section]
To reply to a mail message:
To include the original message each time you reply to any message, and to specify how to place the original message in the reply:
Automatically quote the original message when replying.
Start my reply below the quoteis the default.
below the quote (recommended)to place your signature at the very end of the message below the quoted text.
below my reply (above the quote)to place your signature between your reply and the quoted text.
[Return to beginning of section]
When you forward a message, you can specify how to place new text relative to the original text: inline (in the body of the message; this is the default), or as an attachment.
To forward a message:
To set the default for forwarding messages:
Tip: To override the default for forwarding a message, select the message, open the Message menu, and choose Forward As, then choose Inline or Attachment.
[Return to beginning of section]
You can use return receipts to notify you when a recipient has displayed (opened) your message. The recipient must be using a mail program that supports the Message Disposition Notification (MDN) standard. Keep in mind that the recipient may choose not to send you a return receipt, even if you've requested one. Messages you send to a newsgroup address will not include a return receipt request, since news servers don't support this feature.
To request return receipts for all messages you send, you can use the global Return Receipt preferences to specify how to manage requests you receive for return receipts. You can override these global preferences for individual accounts.
To request a return receipt on a per-message basis:
To automatically request return receipts when sending messages from each of your mail accounts:
When sending messages, always request a return receipt.
For more information on setting return receipt preferences, see Mail & Newsgroups Preferences - Return Receipts.
[Return to beginning of section]
To save a mail message as a draft so you can complete it later:
Note: Your mail message will stay open after you save it as a draft.
To edit or send a message draft, begin from the Mail window:
Note: Sending the message removes it from the Drafts folder.
Tip: You can also double-click the message to open it for editing. This is especially useful if the message pane is closed.
To delete one or more unwanted message drafts, begin from the Mail window:
[Return to beginning of section]
Templates are useful for setting the default format for messages that you send regularly, such as weekly status reports. You can save a message as a template from any window in which it is displayed, including from within a Mail compose window.
To save a message to use as a template:
Alternatively, open an existing message that already has the formatting you want.
To compose a message using a template:
Note: Sending the message does not remove the template from the Templates folder. The template is preserved for future use.
To delete one or more unwanted message templates, begin from the Mail window:
[Return to beginning of section]
HTML messages can include formatted text, links, images, and tables—just like a web page. However, some recipients may not be able to receive HTML messages. &brandShortName; Mail & Newsgroups allows you to compose mail and newsgroup messages using either the HTML (rich-text) formatting editor or the plain-text editor for each mail account you have. In addition, you can choose whether your addressees should receive HTML or plain-text messages by default, and how Mail & Newsgroups should handle messages when it's not known if an addressee can receive HTML-formatted mail.
To specify whether to use the HTML editor as the default for composing messages, begin from the Mail window:
Compose messages in HTML format. You see the Formatting toolbar in the Compose window. Leave this box unchecked to use the plain-text editor for this account.
[Return to beginning of section]
If you understand how to work with HTML source code, you can edit or insert additional HTML tags, style attributes, and JavaScript in your mail message. If you are not sure how to work with HTML source code, it's best not to change it. To work with HTML code, use one of these methods:
For more information on editing HTML source code, see Using the Advanced Property Editor.
[Return to beginning of section]
By default, Mail & Newsgroups prompts you before sending HTML messages when it's not known whether the recipient's mail program can display HTML-formatted messages.
To choose sending-format options for mail messages, begin from the Mail window:
Note: This preference applies only to mail messages, not to newsgroup messages.
If while composing a message you realize that one or more recipients may not be able to receive HTML-formatted mail, you can easily convert the message to a different format when you click Send:
[Return to beginning of section]
You can save time by indicating whether individuals in your address books prefer to receive either HTML messages or plain text messages.
Card fordialog box.
Prefers to receive messages formatted asdrop-down list to select HTML if you know this recipient can read HTML-formatted messages (such as messages that include links, images, or tables).
If this recipient can only read messages sent as plain text (no formatting), then choose Plain Text. If you don't know or are not sure, choose Unknown.
If you choose Unknown, &brandShortName; Mail & Newsgroups determines the sending format based on the Send Format settings for Mail & Newsgroups in the Preferences dialog box. If Mail & Newsgroups still can't determine the correct format, it will prompt you to choose a sending format when you send the message.
[Return to beginning of section]
You can quickly view the HTML and other code that generates an HTML message you've received:
[Return to beginning of section]
The HTML Mail Question dialog box appears when you try to send a message to someone whose mail program may not be able to display HTML messages or when Mail & Newsgroups cannot determine whether your recipient can display HTML messages. If you are in doubt, send the message in both HTML and plain-text formats.
[Return to beginning of section]
To attach a file to an outgoing mail message:
Enter file to attachdialog box.
Tip: You can also click inside the Attachments area to attach a file.
Tip: You can also drag and drop one or more files from your desktop into the Attachments area in the Compose window.
To attach a web page to an outgoing mail message:
Tip: When you are viewing a page in the Navigator browser, you can send the page to someone by opening the File menu and choosing Send Page.
[Return to beginning of section]
If you receive a mail attachment that consists of a file type that &brandShortName; can display (such as graphic files and HTML files), you see the attachment displayed inline (in the body of the message). For other file types, Mail & Newsgroups lets you open the attachment using another application, or you can save the attachment on your hard disk.
To open the attachment, make sure you have a program on your computer that can open files of the same type as the attachment's file format. For example, if you want to open a .DOC file, make sure you have a program on your computer that can open .DOC files.
To open an attachment:
Chooseto use a different application to open the attachment.
Advancedto add a new file type to the list of helper applications. &brandShortName; uses helper applications to determine how different file types are opened by other applications from within &brandShortName;. For more information, see Plug-ins and Downloads.
Note: If you are viewing your mail using an IMAP mail server, all attachments remain on the server.
[Return to beginning of section]
To save an attachment:
Attachments, select the attachment that you want to save.
Tip: To save all attachments, right-click or, if you have a one-button mouse, Ctrl-clickthe first one in the attachment list, and choose Save All. You can then specify the location where you want all the attachments to be saved.
[Return to beginning of section]
How you delete messages depends on your mail server type: POP or IMAP. Deleted POP messages are automatically moved to the Trash folder. IMAP users can set different options for deleting messages.
To delete messages from your Inbox or other folders, begin from the Mail window:
To delete messages without opening them, begin from the Mail window:
Alternatively, click the Message Pane handle (the ridged area centered at the bottom of the message list) to close the message pane.
To set deletion preferences for IMAP messages:
[Return to beginning of section]
If you use a POP server to deliver your mail, or if you set up IMAP to use the Trash folder, follow these steps to delete messages from your Inbox or other folders:
To recover messages from the Trash:
To delete messages permanently:
[Return to beginning of section]
Address books store email addresses and contact information for people you typically send mail to, such as colleagues, friends, and family. &brandShortName; Mail & Newsgroups provides you with two address books: the Personal Address Book and the Collected Addresses—and you can create additional address books as well. You can also import address books from other mail programs and previous versions of &brandShortName;. The contents of these address books are stored locally on your hard disk.
Your address book may also list email addresses from an LDAP directory, which is located on an LDAP directory server. The directory server stores email addresses of people that are not included in your locally-stored address books. The Lightweight Directory Access Protocol (LDAP) is an industry-standard method for accessing Internet or intranet directory services such as corporate address books.
Use the Personal Address Book to add specific names of your choice. You can create mailing lists and edit individual address entries.
By default, the Collected Addresses automatically collects the email addresses contained in outgoing mail messages. Addresses from outgoing messages are stored in the Collected Addresses as soon as you click Send.
An LDAP directory (also known as an address lookup service) stores email addresses of recipients who are not in your locally-stored address books. LDAP directories offer you access to large, centrally maintained databases of email addresses, which is especially useful with address autocompletion.
Automatic address collection is enabled by default. To change automatic address collection settings, begin in the Mail window:
Add email addresses to myand choose whether you want:
To open the Address Book window:
 |
|
| Address Book icon | |
To customize how the Address Book window and the cards are displayed:
[Return to beginning of section]
You can use any of the following ways to add entries to your address books:
Add to Address Bookfrom the drop-down list.
[Return to beginning of section]
&brandShortName; Mail & Newsgroups provides a default personal address book, but you can create additional address books.
To create a new address book:
|
|
| Address Book icon | |
[Return to beginning of section]
Address book cards can be used to store names, postal addresses, email addresses, phone numbers, and information such as whether the addressee prefers to receive plain-text or HTML-formatted messages.
To create an address book card for an individual:
Tofield of the Compose window).
Tip: If you enter address information, &brandShortName; displays a Get Map button next to the address when you view this entry's address book card in your address book. Clicking the Get Map button displays a web page that contains a map to the address.
Tip: To quickly add entries to your address book, click any email address in messages you receive and select Add to Address Book from the drop-down list. The New Card dialog box appears where you can complete the information.
To view or edit the properties for an individual card:
[Return to beginning of section]
If you regularly send messages to a group of recipients, you can quickly address a message by using a mailing list that contains the names you want.
To create a mailing list and add it to your address book:
Add toto choose an address book in which to store the list.
Tofield of a message, everyone on the list receives your message.
In the left side of the Address Book window, the mailing list appears underneath the address book you added it to.
[Return to beginning of section]
Mailing lists are stored in the address book in which you created them.
To remove a member from the list, begin from the Mail window:
To add members to a mailing list:
[Return to beginning of section]
&brandShortName; Mail & Newsgroups lets you quickly search an address book or directory by name or email address, or use a combination of criteria to perform a more specific search through an address book or directory.
To quickly search an address book or directory for a name or email address, begin from the Address Book window:
Name or Email containsfield, type the name or email address that you want to find. You can type only part of the name or email address, or you can type the exact text that you want to find.
As soon as you stop typing, &brandShortName; Mail & Newsgroups displays only those entries where the name or email address contains the search text you entered.
You can search address books or directories for specific entries. If you are not already viewing the Advanced Address Book Search dialog box, begin from the Address Book window:
Search in, choose the address book or directory through which you want to search.
[Return to beginning of section]
If you have a &brandShortName; address book from another user profile or computer, or if you have an address book from another mail program, you can import its entries into the Address Book window as a new address book. Keep in mind that when you upgrade a user profile from an earlier version of &brandShortName;, your address books are automatically included, so there's no need to import them.
You can import address books from Netscape 6, Netscape 7, Eudora, Outlook, Outlook Express, or text files (LDIF, tab-delimited (.tab), comma-separated (.csv), or text (.txt) formats). When you import an address book, Mail & Newsgroups creates a new address book with the imported entries.
You can also import mail messages and settings from Communicator, Eudora, Outlook, and Outlook Express.
To import an address book, begin from the Mail window:
[Return to beginning of section]
You can export a &brandShortName; address book if you later want to import it into another user profile, move it to another computer, or use it with another program that can import address books. You can export an address book to one of these file formats: &brandShortName; (.ldif), tab-delimited (.tab), comma-separated (.csv), or text (.txt) formats.
To export an address book, begin from the Address Book window:
[Return to beginning of section]
Adding an LDAP directory to your address book allows you to search the directory for email addresses and other contact information. You can also use the directory for address autocompletion when addressing mail messages.
You typically add or remove LDAP directories using instructions provided by your system administrator. Check with your system administrator for the information you will need in order to add a new directory to your address book.
To add a new directory, begin from the Address Book window:
The directory you added appears in the list of address books in the Address Book window.
To delete a directory:
For information on downloading or synchronizing a directory for offline use so that you can search it or use it for address book autocompletion while working offline, see Downloading Directory Entries for Offline Use.
If you are not already viewing the Directory Server Settings dialog box, begin from the Mail window:
General Tab
Advanced Tab
[Return to beginning of section]
To create a message folder, begin from the Mail window:
[Return to beginning of section]
To rename an existing folder, begin from the Mail window:
Note: If you rename a folder that you've been using to store filtered messages, the filter will automatically update to use the renamed folder.
[Return to beginning of section]
You can copy a folder and its contents to another mail account, or move a folder within the same mail account.
To move or copy a folder, begin from the Mail window:
[Return to beginning of section]
You can move messages from one folder to another by using either of these methods:
Note: If you drag and drop a message from an IMAP or POP mail server folder to a local folder on your hard drive, the message is moved to the local folder and removed from the server folder.
To copy a message from one folder to another:
Copy Toand then select the destination account and folder from the drop-down list.
Tip: Alternatively, you can copy a message between folders by holding down the Shift key while dragging the message from the message list over another folder.
[Return to beginning of section]
Users with IMAP mail accounts can share mail folders with other users on the same network. Sharing folders allows several users to see and work with the same messages, similar to a newsgroup. To use shared folders, your IMAP mail server must support Access Control List (ACL) management. Check with your system administrator or help desk if you are not sure that shared folders are supported by your IMAP mail server.
To share a mail folder with other users on your network, or to view sharing information for a folder, begin from the Mail window:
Folders listed under Local Folders, or folders listed under a POP mail account cannot be shared.
The Privileges button is only available if the IMAP mail server allows you to set folder sharing privileges. If this button is not available, you can view the folder sharing privileges for this folder but cannot change them.
In the list of folders for your mail account, a shared folder displays a distinctive folder icon to indicate that it is shared.
To send a message that tells others how they can subscribe to your shared folder, begin from the Mail window:
Only message recipients who share the same network will be able to subscribe to your shared folder.
Subscribing to a shared folder is similar to subscribing to a newsgroup. To subscribe to a shared folder, begin from the Mail window:
[Return to beginning of section]
You can apply tags to messages to help you organize and prioritize them. You can apply a standard color and tag text to messages, or you can create your own color and tag text to suit your needs.
One powerful way to use tags is to set up a message filter to
automatically tag incoming messages from a specific sender. For example,
you can set up a message filter so that incoming messages from your boss are
tagged Important
and appear in red. See
Creating Message Filters for more
information.
To apply a tag to a message, begin from the Mail window:
The message summary row changes to the color of the tag with the topmost priority. To see the tag text, you must display the Tags column in the Mail window.
Tip: To quickly tag messages or remove a tag, select one or more messages and press one of the number keys 1-9 on your keyboard. Press 0 to remove all tags.
To display the Tags column, begin from the Mail window:
and select Tags from the list.Note: Message tags apply on a per-account basis. For example, if you move or copy a tagged message to another mail account, the tags are not preserved. Similarly, if you forward a tagged message to another recipient, the tags are not preserved. For IMAP mail accounts, if your IMAP server supports user-defined keywords, message tags will persist when you log in to your mail account from a different location.
[Return to beginning of section]
You can customize tag colors and text and their order to suit your needs.
To customize tags, begin from the Mail window:
Your changes are immediately applied to all tagged messages in all your mail accounts.
Tip: To undo all customizations and restore just the default tags' text and colors, follow the steps above to display the tag settings, and click Restore Defaults.
[Return to beginning of section]
To sort messages by tags, begin from the Mail window:
and select Tags from the
list.[Return to beginning of section]
To remove a message tag, begin from the Mail window:
Noneto remove all tags from this message.
[Return to beginning of section]
You might want to mark a message you've read as unread if you later want to re-read the message or respond to it.
To mark a message as unread, begin from the Mail window:
 symbol in the Read column. Messages marked as read display a
 symbol in the Read column. If the
Read column is not visible, click the Show/Hide Columns icon
and select Read from the list.
symbol in the Read column. If the
Read column is not visible, click the Show/Hide Columns icon
and select Read from the list. |
|
| Read column | |
You can flag messages that you later want to download for offline use.
To flag messages, begin from the Mail window:
 appears where you clicked to
indicate that the message has been flagged. If the Flag column is not
visible, click the Show/Hide Columns icon and select Flag from the list.
appears where you clicked to
indicate that the message has been flagged. If the Flag column is not
visible, click the Show/Hide Columns icon and select Flag from the list. |
|
| Flag column | |
[Return to beginning of section]
You can apply preset or custom message views to help you manage messages by filtering displayed messages.
To use a message view, open the View menu and choose Messages. Choose an option from the submenu.
People I Know,
Recent Mail,
Last 5 Days, and
Not Junk.
Tip: You can quickly change message view from the View box in the Search Bar. If you do not see the Search Bar, open the View menu, choose Show/Hide, and then choose Search Bar.
 |
|
| Quick mail search bar | |
You can create custom message views to only display messages matching certain criteria.
To change or create a custom message view:
all of the followingconditions (criteria) you choose, or
any of the following.
Subject,
Sender,
contains,
doesn't contain) and then type the text or phrase you want to match.
Tip: To search for messages that contain a header not listed in the first drop-down menu (for example, if you want to search for messages that include the header Resent-From), choose Customize and type the header you want to search for. &brandShortName; Mail & Newsgroups adds your custom header to the drop-down list, so you can then choose it to search for matching entries. Make sure you enter the custom header correctly, since Mail will only find entries that exactly match what you type.
[Return to beginning of section]
Message filters allow you to manage and organize your messages. You can create message filters that &brandShortName; Mail & Newsgroups uses to automatically perform certain actions on incoming messages based on criteria you specify. For example, you can create a message filter that automatically moves incoming messages to a particular folder. Message filters operate on a per-account basis.
If you are not already viewing the Message Filters dialog box, begin from the Mail window:
all of the followingconditions (criteria) you choose, or
any of the followingconditions.
Subject,
Sender,
contains,
doesn't contain) and then type the text or phrase you want to match.
Tip: To search for messages that contain a header not listed in the first drop-down menu (for example, if you want to search for messages that include the header Resent-From), choose Customize and type the header you want to search for. &brandShortName; Mail & Newsgroups adds your custom header to the drop-down list, so you can then choose it to search for matching entries. Make sure you enter the custom header correctly, since Mail will only find entries that exactly match what you type.
+to add criteria and
-to remove them.
Tip: To automatically tag incoming messages, choose
Tag the message
from the drop-down list.
To manage your filters, begin from the Mail window:
Move Upor
Move Downto move it.
Note: Filters are applied to each incoming message in the order you choose, until a filter action results in the message being deleted or moved from the Inbox folder.
Note: If you delete a folder that you've been using to store filtered messages, the filter will no longer work. Incoming messages that match the filter criteria will appear in your Inbox. If you rename or move the folder, the filter will automatically update to use the renamed or moved folder.
Tip: If you have existing messages that you want to move to another folder, use the Run Filters on Messages option in the Tools menu.
[Return to beginning of section]
You can quickly create a filter for messages from a particular sender. For
example, if you want to automatically move all incoming messages from your
child's teacher into a folder called School
, you can quickly set
up a filter to do this.
To create a filter for messages from a specific sender, begin from the Mail window:
[Return to beginning of section]
&brandShortName; Mail & Newsgroups lets you quickly find text in a single message, search messages by subject or sender, or use a combination of criteria to perform a thorough search through all messages in a specific mail folder, newsgroup, or account.
To locate text in a single message, begin from the Mail window:
To quickly search for messages in a selected folder by subject or sender, begin from the Mail window:
Subject or Sender contains:, type the subject text or sender name that you want to find. You can type only part of the subject or sender, or you can type the exact word or name that you want to find.
As soon as you stop typing, &brandShortName; Mail & Newsgroups displays only those messages in the selected folder where the subject or sender contains the search text you entered.
You can search mail folders or newsgroups for specific messages. If you are not already viewing the Search Messages dialog box, begin from the Mail window:
Search for messages in, choose the account, newsgroup, or folder through which you want to search.
Search subfoldersto include all subfolders in the search.
Search local systemto search only messages from newsgroups or IMAP accounts that have been saved locally.
Note: The checkbox will be disabled if it's not possible to search remotely stored messages.
Subjectand
contains) and then type the text or phrase that you want to match.
Tip: To search for messages that contain a header not listed in the first drop-down menu (for example, if you want to search for messages that include the header Resent-From), choose Customize and type the header you want to search for. &brandShortName; Mail & Newsgroups adds your custom header to the drop-down list, so you can then choose it to search for matching entries. Make sure you enter the custom header correctly, since Mail will only find entries that exactly match what you type.
[Return to beginning of section]
This section describes how to use &brandShortName;'s Junk Mail Controls to filter unwanted mail, and how phishing detection works.
&brandShortName;'s Junk Mail Controls feature can evaluate your incoming messages and identify possible junk (or unsolicited) messages. The feature uses the Bayesian classification method. You first train &brandShortName; by showing it a bunch of mail that is junk, and a bunch of mail that is not. Then, you let it auto-classify new mail for you. If &brandShortName; makes any mistakes, you can correct them.
To use Junk Mail Controls:
Markand choose
As Junkor
As Not Junk.
Click to toggle the Junk Status column in the message list. (If you
do not see it, click the right-most button (
) in the list header bar and
select Junk Status from the pop-up menu.)
When you toggle junk status, a trash-can icon will appear or disappear in the Junk status column to indicate the junk status of the selected message.
Run Junk Mail Controls.
Note: &brandShortName; will only run Junk Mail Controls when the training database has information on non-Junk messages. If Junk Mail Controls do not work, select some messages and explicitly mark them as Not Junk.
[Return to beginning of section]
To fine-tune how Junk Mail Controls work, use the global Junk Mail preference panel for account-independent settings and the account manager's Junk Settings for settings of a specific mail account.
[Return to beginning of section]
Junk Mail Controls run after mail filters and apply only to the Inbox folder and its sub-folders. Use this to your advantage, for example, you can filter mail you are sure not to be Junk to a special folder outside of Inbox so that the messages will not be classified as Junk (especially useful if you subscribe to newsletters or if you are on a moderated mailing list).
[Return to beginning of section]
Phishing is a particularly common fraudulent business scheme in which a party creates counterfeit websites designed to trick recipients into divulging personal data such as credit card numbers, account usernames, passwords and social security numbers. Hijacking brand names of banks, e-retailers and credit card companies, phishers often convince recipients to respond.
In many cases, you'll receive a link to a phishing page via an email which claims to come from an official-looking address. You can also end up at these pages by following links that you find on the Web or in IM messages.
Tip: Since a forged URL can look very similar to a genuine one, it's safer to use a bookmark you've created or to type the URL into the location bar by hand instead of following a link in an email message. Always consider the risk of a forged URL if you're asked to log in or provide private information on a website.
&brandShortName; Mail phishing detector is enabled by default. When it encounters a mail which seems to be scam, it will show a warning bar in the message window.
If you think that the email is a valid one, you can click on the Not
Scam
button, and the warning bar will disappear.
When a user clicks on a link in an email that appears to be a phishing URL, &brandShortName; will prompt the user with a dialog box before the Web site is opened.
This prompt will appear if either of the following is true: the host name of the actual URL is an IP address, or the link text is a URL whose host name does not match the host name of the actual URL.
Note: Phishing detection has a higher precedence than Junk Mail detection.
For more technical details on this subject, see the online document Know your Enemy: Phishing.
[Return to beginning of section]
This section describes how to import mail messages and settings from Netscape Communicator, Outlook, Outlook Express, and Eudora. To import address books from these programs, see Importing Address Books.
To import mail messages from Netscape Communicator, Outlook, Outlook Express, or Eudora, begin from the Mail window:
For Netscape Communicator, the wizard imports a copy of all Communicator mail folders included under Local Folders. Imported mail is added as a new folder under Local Folders in the Mail window. (The Communicator mail folders still remain in their original location).
[Return to beginning of section]
To import mail settings from Outlook, Outlook Express, or Eudora, begin from the Mail window:
[Return to beginning of section]
If you have set up an account on a newsgroup server, you can join (subscribe) to newsgroups (also called discussion groups).
To subscribe to a newsgroup, begin from the Mail window:
If you are an IMAP mail user, you can also subscribe to message folders located on an IMAP server. (Your Inbox is a type of message folder.) Follow the instructions above for subscribing, but select an IMAP account from the Account drop-down list. For more information on sharing folders and subscribing to folders, see Sharing Folders With Other Users (IMAP Only).
[Return to beginning of section]
When you open your newsgroup server, you see the list of newsgroups to which you subscribe. The server downloads the headers of new messages in each newsgroup.
To read newsgroup messages, begin from the Mail window:
[Return to beginning of section]
To start new threads (discussions):
[Return to beginning of section]
To post a response to the newsgroup:
To reply to an individual as well as post a response to the group:
To redirect a posting to another newsgroup:
Followup-Tofrom the
Newsgroupdrop-down list. Subsequent responses will be posted to the newsgroup you enter.
[Return to beginning of section]
To monitor unread messages in threads that are of interest to you:
To ignore a message thread:
[Return to beginning of section]
To remove a newsgroup from your list:
[Return to beginning of section]
If the newsgroup you want to subscribe to is on a different server, you must first set up access to that server.
To set up an additional newsgroup server, open the File menu in the Mail window and choose New, then Account.
Once you've set up access to the new server, you can subscribe to newsgroups on that server. In the Mail window, open the File menu, and choose Subscribe.
[Return to beginning of section]
&brandShortName; Mail & Newsgroups' offline feature lets you download your mail and read it offline (while disconnected from the Internet). If you use a dial-up (modem) connection to access your mail and you want to reduce the time you are connected, or, if you need to temporarily disconnect from your company's network while traveling or switching locations, you can download your mail so that you can read it offline. The offline feature can automatically download incoming messages and then later send all your outgoing messages when you reconnect.
Note that for POP accounts your mail is already downloaded by default, so most of these offline features aren't relevant for POP accounts.
If you occasionally want to work offline, &brandShortName; Mail & Newsgroups lets you easily:
If you frequently work offline, &brandShortName; Mail & Newsgroups also lets you:
[Return to beginning of section]
You can tell &brandShortName; Mail & Newsgroups to automatically download your Inbox messages for offline use. Later, when you go back online, &brandShortName; Mail & Newsgroups automatically synchronizes your Inbox messages with the server.
Note that the Inbox for POP accounts is downloaded by default, so this section does not apply for POP accounts.
To automatically download your Inbox for offline use, begin from the Mail window:
Make the messages in my Inbox available when I am working offline.
 in the lower right corner of the
Mail window (to the left of the Cookie icon) to go offline.
in the lower right corner of the
Mail window (to the left of the Cookie icon) to go offline.&brandShortName; Mail & Newsgroups automatically downloads all messages in your Inbox so you can read and respond to them while working offline. After disconnecting, &brandShortName; Mail & Newsgroups remains open so you can continue to work with your messages.
To reconnect to the Internet so you can work online:
 in the lower right corner of the Mail window (to the left of the
Cookie icon) to go back online.
in the lower right corner of the Mail window (to the left of the
Cookie icon) to go back online.When you go back online, &brandShortName; Mail & Newsgroups automatically synchronizes your Inbox messages with the server, by replicating any changes you made while working offline.
Tip: &brandShortName; Mail & Newsgroups saves any messages that you send while working offline in the Unsent Messages folder under Local Folders. To have &brandShortName; Mail & Newsgroups automatically send your unsent messages when you reconnect, use the Preferences command on the &brandShortName; Edit menu to change the offline preferences for all your accounts.
[Return to beginning of section]
Note that POP accounts don't allow you to manage folders on the POP server, so this section does not apply to POP accounts.
To download a specific folder for offline use, begin from the Mail window:
Select this folder for offline use.
in the lower right corner of the Mail window to go offline.&brandShortName; Mail & Newsgroups automatically downloads all messages in the selected folder so you can read and respond to them while working offline. After disconnecting, &brandShortName; Mail & Newsgroups remains open so you can continue to work with your messages.
Note: Message headers that have been downloaded for reading offline display a darker gray envelope or newsgroup icon.
To reconnect to the Internet so you can work online:
in the lower right corner of the Mail window (to the left of the
Cookie icon) to go back online.&brandShortName; Mail & Newsgroups automatically synchronizes the offline folders with the server, by replicating any changes you made while working offline.
Tip: &brandShortName; Mail & Newsgroups saves any messages that you sent while working offline in the Unsent Messages folder under Local Folders. When you reconnect, choose Send Unsent Messages from the File menu to send all your saved messages at once. To have &brandShortName; Mail & Newsgroups automatically send your unsent messages when you reconnect, use the Preferences command on the &brandShortName; Edit menu to change your offline preferences.
[Return to beginning of section]
Note that messages are downloaded by default for POP accounts. However, if
you have enabled the Fetch headers only
setting in the POP account
settings, then only the headers will be downloaded, and you will need to use
the commands in this section to download the complete messages.
To download selected messages for offline use, begin from the Mail window:
To download flagged messages for offline use, begin from the Mail window:
and select Flag from the list.Once downloading is complete, click the Online/Offline indicator in the lower right corner of the Mail window (to the left of the Cookie icon) to go offline. After you disconnect, &brandShortName; Mail & Newsgroups remains open so you can continue to work with your messages.
Note that the Get Selected Messages
and Get Flagged Messages
menu items are also available in the pop-up thread context menu, for faster
access.
Note: Message headers that have been downloaded for reading offline display a darker gray envelope or newsgroup icon.
To reconnect to the Internet so you can work online:
in the lower right corner of the Mail window to go online.Tip: &brandShortName; Mail & Newsgroups saves any messages that you sent while working offline in the Unsent Messages folder under Local Folders. When you reconnect, choose Send Unsent Messages from the File menu to send all your saved messages at once. To have &brandShortName; Mail & Newsgroups automatically send your unsent messages when you reconnect, use the Preferences command on the &brandShortName; Edit menu to change your offline preferences.
[Return to beginning of section]
You can download (replicate) the entries in a directory server to your computer so that they are available when you work offline. Once you've downloaded directory entries, you can use the same procedure to update your local copy of the entries with the latest entries on the directory server.
To download or update an address book LDAP directory for offline use:
Depending on the number of directory entries, the download process may take a while, so please be patient.
After the download finishes, you can work offline and search the directory or use it for address autocompletion when composing messages. After you've been using your local copy of the directory for a while, you may wish to update it to get the latest entries from the directory server. To update your local copy, use the procedure described above.
[Return to beginning of section]
To set up one or more accounts for working offline, you use the Offline and Disk Space preferences in the Mail & Newsgroups Account Settings dialog box. Once set, you don't need to change these preferences each time you want to work offline. The offline and disk space preferences you can set for an account depend on the type of account (IMAP, POP, or Newsgroup).
Here's a summary of the steps you will follow to set up your accounts for offline use:
Once set, you don't need to change these settings. See the sections below for information on setting offline and disk space preferences for IMAP, POP, and Newsgroup accounts.
Tip: To set the Offline & Disk Space preferences for the current account, open the File menu, choose Offline, and then choose Offline Settings.
Important: You must select at least one category (mail messages or newsgroup messages) in order for the download to work.
Work offline once download and/or sync is complete.
For subsequent offline sessions, you can skip step 1.
[Return to beginning of section]
Before you can read mail and newsgroup messages while offline, you must first select them for downloading. You can set up an entire account for offline use. You can also choose which folders and newsgroups that you want to use offline.
Note: Keep in mind that selecting more items may increase download time and disk space used.
To select accounts, folders, and newsgroups for offline viewing, begin from the Mail window:
Note: You see only the newsgroups and folders that you've already subscribed to. POP accounts and local mail folders don't appear in the list.
Once set, you don't need to change these settings each time you want to go offline. However, if you do want to change them, you can easily do so before going offline, since the same Select button is available when using the Download and Sync command.
[Return to beginning of section]
If you have already selected mail folders and newsgroups for offline use, you are now ready to download and synchronize them. If you haven't yet selected items to download, you can choose them before you go offline.
If you are not already viewing the Download/Sync Now dialog box, follow these steps:
To download and synchronize your messages, begin from the Mail window:
Important: You must select at least one category (Mail messages, Newsgroup messages) in order for the download to work. If the checkboxes are disabled, it means that you haven't yet selected items to download. Use the Select button to select items to download.
Send Unsent Messages.
Work offline once download and/or sync is complete.
If you chose to work offline once the download completes, then
&brandShortName; Mail & Newsgroups immediately switches to offline mode.
Otherwise, when you are ready to go offline, click the Online/Offline
indicator in the lower right corner of
the Mail window to go offline.
[Return to beginning of section]
To work offline and reconnect later, begin from the Mail window.
When you are ready to work offline:
in the lower-right corner of the Mail window. Mail & Newsgroups prompts
you to download messages, if you want, before going offline.Note: Message headers that have been downloaded for reading offline display a darker gray envelope or newsgroup icon.
Tip: To set &brandShortName; Mail & Newsgroups' download behavior when going offline, open the &brandShortName; Edit menu, choose Preferences, and then click the Offline & Disk Space category. You can choose to have &brandShortName; Mail & Newsgroups prompt you to download messages when going offline, to automatically download messages, or to not download any messages.
To reconnect and synchronize your messages:
in the lower-right corner of any &brandShortName; window.&brandShortName; Mail & Newsgroups synchronizes your messages with the server by replicating any changes you made while working offline.
Tip: To set &brandShortName; Mail & Newsgroups' behavior when going online, open the &brandShortName; Edit menu, choose Preferences, and then choose the Offline & Disk Space category. You can choose to have &brandShortName; Mail & Newsgroups prompt you to send unsent messages, to automatically send unsent messages, or to not send unsent messages.
[Return to beginning of section]
This section describes the settings in the Mail & Newsgroups Account Settings dialog box. Unlike the Preferences dialog box, which applies settings to all accounts, the Mail & Newsgroups Account Settings dialog box lets you specify settings on a per-account basis.
If you are not currently viewing the Mail & Newsgroups Account Settings dialog box, follow these steps:
This section describes how to view or change your Account Settings, such as your user name, reply-to address, and signature file. If you are not already viewing the Account Settings, begin from the Mail window:
[Return to beginning of section]
&brandShortName; Mail & Newsgroups can work with two types of mail servers: IMAP and POP. If you are not sure which server type your Internet service provider supports, ask your service provider. If your Internet service provider supports both, the following descriptions may help you choose which one to use.
[Return to beginning of section]
Advantages: Your messages and any changes to them stay on your server, saving local disk space. Also, you always have access to an updated mailbox, and you can get your mail from multiple locations. Performance on a modem is faster, since you initially download message headers only.
Disadvantages: Not all ISPs support IMAP.
[Return to beginning of section]
Advantages: Your messages are downloaded to your local computer all at once, but you can also specify whether to keep copies of the messages on the server and delete messages on the server when they are deleted locally. Most ISPs currently support POP.
Disadvantages: If you use more than one computer, messages might reside on one or the other, but not both. POP doesn't work as well as IMAP over a slow link connection. Also, you can't access all mail folders from multiple locations.
Note that more recent POP servers have features that allow retrieving only the headers instead of the full message, like IMAP allows. Using these features allows performance with POP to be nearly as fast as with IMAP.
[Return to beginning of section]
If you are not already viewing the IMAP server settings, begin from the Mail window:
Move it to the Trash folderis recommended unless you are instructed to use a different setting by your system administrator or service provider. Messages marked as deleted are removed only when you compact folders.
In most cases, advanced IMAP server settings are automatically supplied by the server. If you are unsure about the settings for this dialog box, contact your ISP or system administrator.
If you are not already viewing the advanced IMAP server settings, begin from the Mail window.
subscribed folders
For more information, see Adding and Removing LDAP Directories.
[Return to beginning of section]
If you are not already viewing the POP server settings, begin from the Mail window:
TOPcommand. Most recent POP servers support it, but if you are unsure about your server, contact your service provider or system administrator.
[Return to beginning of section]
This section describes how to change news server settings. If you are not already viewing news server settings, begin from the Mail window:
Pushed Authentication).
[Return to beginning of section]
This section describes the settings for sending automatic copies, and for storing copies of outgoing messages, message drafts, and message templates.
By default, &brandShortName; Mail & Newsgroups stores copies of your outgoing messages in the Sent folder for the current account. &brandShortName; Mail & Newsgroups also stores message drafts in the Drafts folder and message templates in the Templates folder for the current account.
If you are not already viewing the settings for Copies & Folders, begin from the Mail window:
[Return to beginning of section]
You use Composition settings to choose how to format text and to handle replies.
Tip: If you only want to use an editor occasionally, you can hold down the Shift key while clicking the Compose or the Reply button to switch to the non-default on an as-needed basis.
You use Addressing settings to override the global LDAP server settings specified for all address books in the Preferences dialog box. LDAP server settings affect the behavior of address autocompletion, and you can change these settings for each account if necessary.
Address autocompletion uses your address books to find matching entries when you type email addresses in the addressing area of the Compose window.
If you are not already viewing the Addressing settings, begin from the Mail window:
The directory you select will also be searched for matching certificates when you attempt to send an encrypted message to one or more recipients for whom you don't have certificates on file.
[Return to beginning of section]
Offline & Disk Space settings let you conserve disk space or set up an account so that you can use it while offline (disconnected from the Internet). The settings available depend on the mail server type (IMAP, POP, or News) associated with the account.
[Return to beginning of section]
If you are not already viewing the offline and disk space preferences for an IMAP account, begin from the Mail window:
[Return to beginning of section]
Messages from POP accounts are fully downloaded to your local machine unless
you have enabled the Fetch headers only
setting. This section
describes how you can save disk space for a POP account. If your account has
the Fetch headers only
setting enabled, then these Disk Space
preferences are ignored. If you are not already viewing the Disk Space
preferences for a POP account, follow these steps:
Begin from the Mail window.
[Return to beginning of section]
If you are not already viewing the offline and disk space settings for a News account, begin from the Mail window:
The following settings help to save disk space and download time. Specify which messages you don't want to download locally:
&brandShortName; can automatically delete newsgroup messages for you. You can configure this process with the options listed below Keep:
With the last two settings you can further constrain the three options to delete messages automatically. This is especially useful in combination with the option to keep all messages.
[Return to beginning of section]
This section describes how to use the account junk settings. If you are not currently viewing the Junk Settings, follow these steps:
You use the Junk Settings panel to define your account-specific settings for the adaptive mail filter. Global junk settings are changed under Mail & Newsgroups Preferences - Junk Mail.
Junkfolder on [account]: Select this to use the default Junk folder.
[Return to beginning of section]
This section describes how to use the Return Receipts account settings. If you are not currently viewing the Return Receipts settings, follow these steps:
You use the Return Receipts settings to define return receipt settings for outgoing messages from this mail account. You also use the Return Receipt settings to specify how to manage requests you receive for return receipts. These settings override global return receipt preferences you specified using Mail & Newsgroups Preferences - Return Receipts.
Tip: Choose this option if you want to use a filter that automatically moves return receipt confirmation messages to a folder you specify. For information on creating and using filters, see Creating Message Filters.
[Return to beginning of section]
This section describes how to configure the Mail & Newsgroup Account Settings that control mail message security. Before you do so, however, you must obtain one or more mail certificates. For details, see Signing & Encrypting Messages.
If you are not already viewing the Security settings for your mail account, begin from the Mail window:
The main purpose of the Security panel in Mail & Newsgroup Account Settings is to select two certificates:
Depending on the policies of the certificate authority (CA) that issues your certificate(s), you can use one certificate for both purposes or two different certificates. Even if you use just one, you must specify it twice, once for digital signing and once for encryption.
The certificates you select here are included with every signed message you send. These certificates allow your recipients to verify your digital signature and to encrypt messages that they send to you.
You use the Digital Signing area in the Security panel to specify how you want to sign your email messages:
Regardless of whether the Digitally sign messages
checkbox is
selected here, you can change your mind before you send an individual
message.
To change the digital signature setting for a message you are writing in
the Compose window, click the arrow below the Security icon near the top of
the window and select or deselect Digital Sign This Message
. For
details, see
Signing
& Encrypting a New Message.
You use the Encryption area in the Security panel to specify how you routinely want to use encryption when sending your messages:
Regardless of which encryption option you select, you can change your mind before you send an individual message.
To change the encryption setting for a message you are writing in the Compose window, click the arrow below the Security icon near the top of the window and choose the encryption setting you want. For details, see Signing & Encrypting a New Message.
[Return to beginning of section]
Local Folders is the account where &brandShortName; Mail & Newsgroups saves any messages that you send while working offline. Messages you send while working offline are saved in the Unsent Messages folder under Local Folders. Any folders you create under the Local Folders account reside on your hard disk, so Local Folders is a good place to save messages that you want to keep.
If you are not already viewing the Local Folders settings, begin from the Mail window:
[Return to beginning of section]
The outgoing server will transport your outgoing mail to the intended recipients.
If you are not already viewing the Outgoing Server (SMTP) settings, begin from the Mail window:
[Return to beginning of section]
The sections listed below describe the Mail & Newsgroups preferences that apply to all your mail and newsgroup accounts. To see these preferences:
This section describes the main Mail & Newsgroups preferences. If you are not already viewing the Mail & Newsgroups main preferences, follow these steps:
Note: Setting &brandShortName; Mail & Newsgroups as the default mail application may disable another mail application. To restore the other mail application as the default, deselect this option.
[Return to beginning of section]
Message Display preferences allow you to choose how messages are displayed (for example, font style and color) in all accounts. If you are not already viewing the Message Display settings, follow these steps:
Tip: If you do not want Mail & Newsgroups to mark your messages as read automatically at all, you can select this option and enter a very large number of seconds.
| This: | Converts to: |
| :-) |  |
| :) | |
| :-( |  |
| :( | |
| ;-) |  |
| ;-p |  |
[Return to beginning of section]
Notification preferences allow you to select different methods for informing you on arrival of a new message. So you don't have to always look in the folders.
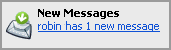 |
|
| Sliding new mail alert | |
When the alert appears, clicking the link displayed in the alert will take you to the first folder that has new mail. If no &brandShortName; applications are running, Quick Launch must be enabled in order to display the new message alert.
If any &brandShortName; application is running, then Quick Launch does not need to be enabled in order to display the new message alert. For information on using Quick Launch, see Using Quick Launch.
Once &brandShortName; Mail has been started, the new message alert will continue to work even after you close the Mail window (as long as another &brandShortName; application is running).
 New mail tray icon
When the icon appears, double-clicking it will open the &brandShortName; Mail & Newsgroups main window.
Once &brandShortName; Mail has been started, the new messages sound will continue to work even after you close the Mail window (as long as another &brandShortName; application is running).
If no &brandShortName; applications are running, Quick Launch must be enabled in order to play a sound when new messages arrive.
If any &brandShortName; application is running, then Quick Launch does not need to be enabled in order to play a sound when new messages arrive. For information on using Quick Launch, see Using Quick Launch.
[Return to beginning of section]
Composition preferences affect how you create messages (for example, forwarding options and address autocompletion) in all accounts. If you are not already viewing the Composition settings, follow these steps:
[Return to beginning of section]
Send Format preferences allow you to specify how you want to format your outgoing messages. If you are not already viewing the Send Format settings, follow these steps:
You can always override these preferences for an individual message by using the Options menu in the Mail Compose window.
For example, if you typically send mail to multiple recipients that have the
same domain name (for example, your colleagues all have email addresses that
end in netscape.net
), and you know that this domain name is capable of
displaying HTML messages, then you can add the netscape.net domain to the
list of HTML Domains so that Mail & Newsgroups will automatically send
messages in HTML format to these recipients.
Similarly, if you typically send mail to recipients at a domain that you know can only receive Plain Text messages, you can add that domain name to the list of Plain Text domains, so that Mail & Newsgroups automatically sends messages to that domain in plain-text format.
Note: If you regularly compose HTML (formatted) mail messages, keep in mind that sometimes not all recipients use mail programs that can display HTML formatting properly. Send Format preferences allow you to specify how you want to format messages that go to recipients who cannot display HTML-formatted mail. You can convert messages to plain text, format them only as HTML, or format them as both HTML and plain text. These preferences apply to all your mail accounts, but only to mail messages and not to newsgroup messages.
Whenever you add a person or address card to your address book, you can specify whether that addressee can receive HTML-formatted messages. However, when this information is unknown, you can set Send Format preferences for how Mail & Newsgroups formats these messages.
[Return to beginning of section]
Addressing preferences allow you to control the settings for &brandShortName; Mail & Newsgroups address books (for example, email address collection and address autocompletion). If you are not already viewing the Addressing settings, follow these steps:
Local Address Books(Personal Address Book, Collected Addresses, or any other local address book) or
Directory Server(an available LDAP directory server) or both. If you want Mail & Newsgroups to highlight addresses that do not autocomplete, then select that option.
Note: If while addressing mail, multiple email address matches are found, Mail & Newsgroups displays a list of all possible choices.
If you select Directory Server, choose a directory server from the list. A directory server lets you look up addresses that are not stored in one of your local address books. The directory you select will also be searched for matching certificates when you attempt to send an encrypted message to one or more recipients for whom you don't have certificates on file.
See Adding and Removing LDAP Directories for information on setting LDAP directory server settings.
Note: Directory server settings you enter from the Preferences dialog box apply to all your mail accounts. You can override these settings for individual accounts by specifying different LDAP directory servers or server settings using the Addressing settings for an account in the Mail & Newsgroups Account Settings dialog box. To set different addressing options for a specific account, open the Edit menu and choose Mail & Newsgroups Account Settings.
[Return to beginning of section]
This section describes how to use the Junk Mail preferences panel. If you are not currently viewing the Junk Mail panel, follow these steps:
Junkfolder: Choose this to move manually-marked Junk messages to the Junk folder.
[Return to beginning of section]
This section describes how to use the Tags preferences panel. You use the Tags preferences to define the tag text, colors and order for message tags. If you are not currently viewing the panel, follow these steps:
[Return to beginning of section]
This section describes how to use the Return Receipts preferences panel. If you are not currently viewing the Return Receipts panel, follow these steps:
You use the Return Receipts preferences to define return receipt settings for outgoing messages from all your mail accounts. You also use the Return Receipt preferences to specify how to manage requests you receive for return receipts.
Tip: Choose this option if you want to use a filter that automatically moves return receipt confirmation messages to a folder you specify. For information on creating and using filters, see Creating Message Filters.
To override these global preferences for individual accounts, see Mail & Newsgroups Account Settings - Return Receipts.
[Return to beginning of section]
Character encoding preferences allow you to choose how messages are encoded when being displayed or created in all accounts. If you are not already viewing the Character Encoding settings, follow these steps:
Tip: You can later view or change the character encoding for a specific folder. In the Mail window, select a folder from the list of Mail folders. Open the View menu, and choose Character Encoding.
quoted printableMIME encoding when sending regular messages that use an 8-bit character encoding (for example, Latin ISO-8859-3).
[Return to beginning of section]
This section describes how to use the Offline & Disk Space preferences panel. If you are not currently viewing the panel, follow these steps:
The Offline & Disk Space preferences allow you to set preferences for working offline, going online, and disk space.
See Working Offline for information on working offline.
[Return to beginning of section]
Copyright © 2003-2010 The Mozilla Foundation.