| .github/ISSUE_TEMPLATE | ||
| img | ||
| src | ||
| .all-contributorsrc | ||
| .gitignore | ||
| LICENSE | ||
| README.md | ||
Please provide your OS name and version if you can run the dashboard on it perfectly in #31, since I only tested on Ubuntu. Thank you!

Wireguard Dashboard


Monitoring WireGuard is not convinient, need to login into server and type wg show. That's why this platform is being created, to view all configurations and manage them in a easier way.
📣 What's New: Version v2.2
- 🎉 New Features
- QR Code: You can add the private key in peer setting of your existed peer to create a QR code. Or just create a new one, dashboard will now be able to auto generate a private key and public key ;) Don't worry, all keys will be generated on your machine, and will delete all key files after they got generated. [❤️ in #29]
- Peer configuration file download: Same as QR code, you now can download the peer configuration file, so you don't need to manually input all the details on the peer machine! [❤️ in #40]
- Autostart on boot: Added a tutorial on how to start the dashboard to on boot! Please read the tutorial below. [❤️ in #29]
- 🪚 Bug Fixed
- When there are comments in the wireguard config file, will cause the dashboard to crash.
- Used regex to search for config files.
Table of Content
- 💡 Features
- 📝 Requirement
- 🛠 Install
- 🪜 Usage
- ✂️ Dashboard Configuration
- ❓ How to update the dashboard?
- 🔍 Screenshot
- ⏰ Changelog
- 🛒 Dependencies
- ✨ Contributors
💡 Features
- Easy to use interface, provided username and password protection to the dashboard
- Add peers and edit (Allowed IPs, DNS, Private Key...)
- View peers and configuration real time details (Data Usage, Latest Handshakes...)
- Share your peer configuration with QR code or file download
- Testing tool: Ping and Traceroute to your peer's ip
- And more functions are coming up!
📝 Requirement
-
Recommend the following OS, tested by our beloved users:
- Ubuntu 18.04.1 LTS - 20.04.1 LTS
- Debian GNU/Linux 10 (buster) [❤️ @robchez]
- AlmaLinux 8.4 (Electric Cheetah) [❤️ @barry-smithjr]
- CentOS 7 [❤️ @PrzemekSkw]
- If you have tested on other OS and it works perfectly please provide it to me in #31. Thank you!
-
Make sure you have Wireguard and Wireguard-Tools (
wg-quick) installed. How to install? -
Configuration files under /etc/wireguard
- Note:
- For
[Interface]in the.conffile, please make sure you haveSaveConfig = trueunder[Interface](Bug mentioned in #9) - For peers,
PublicKey&AllowedIPsis required.
- For
- Note:
-
Python 3.7+ & Pip3
🛠 Install
-
Download Wireguard Dashboard
$ git clone -b v2.2 https://github.com/donaldzou/wireguard-dashboard.git -
Install Python Dependencies
$ cd wireguard-dashboard/src $ python3 -m pip install -r requirements.txt -
Install & run Wireguard Dashboard
$ sudo chmod -R 744 /etc/wireguard # Add read and execute permission of the wireguard config folder $ sudo chmod u+x wgd.sh $ ./wgd.sh startNote:
For
pivpnuser, please usesudo ./wgd.sh startto run if your current account does not have the permission to runwg showandwg-quick. -
Access dashboard
Access your server with port
10086! e.g (http://your_server_ip:10086), continue to read to on how to change port and ip that dashboard is running with.
🪜 Usage
Start/Stop/Restart Wireguard Dashboard
$ cd Wireguard-Dashboard/src
-----------------------------
$ ./wgd.sh start    # Start the dashboard in background
-----------------------------
$ ./wgd.sh debug    # Start the dashboard in foreground (debug mode)
-----------------------------
$ ./wgd.sh stop     # Stop the dashboard
-----------------------------
$ ./wgd.sh restart  # Restart the dasboard
Autostart Wireguard Dashboard on boot
In the src folder, it contained a file called wg-dashboard.service, we can use this file to let our system to autostart the dashboard after reboot. The following has tested on Ubuntu 18.04.1 LTS, please don't hesitate to provide your system if you have tested the autostart on another system.
-
Changing the directory to the dashboard's directory
$ cd wireguard-dashboard/src -
Get the full path of the dashboard's directory
$ pwd
#Output: /root/wireguard-dashboard/src
For me, my output is the one above, your's might be different since it depends on where you downloaded the dashboard. Copy the the output to somewhere, we will need this in the next step.
-
Edit the service file
$ nano wg-dashboard.serviceYou will see something like this:
[Unit]
After=netword.service

[Service]
WorkingDirectory=<your dashboard directory full path here>
ExecStart=/usr/bin/python3 <your dashboard directory full path here>/dashboard.py
Restart=always


[Install]
WantedBy=default.target
Now, we need to replace both
<your dashboard directory full path here>to the one you just copied from step 2. After doing this, the file will become something like this:[Unit] After=netword.service [Service] WorkingDirectory=/root/wireguard-dashboard/src ExecStart=/usr/bin/python3 /root/wireguard-dashboard/src/dashboard.py Restart=always [Install] WantedBy=default.targetBe aware that after the value of
WorkingDirectory, it does not have a/(slash). You can save the file withcontrol+xand pressY. -
Copy the service file to systemd folder
$ cp wg-dashboard.service /etc/systemd/system/wg-dashboard.serviceTo make sure you copy the file successfully, you can use this command
cat /etc/systemd/system/wg-dashboard.serviceto see if it will output the file you just edited. -
Enable the service
$ sudo chmod 664 /etc/systemd/system/wg-dashboard.service $ sudo systemctl daemon-reload $ sudo systemctl enable wg-dashboard.service $ sudo systemctl start wg-dashboard.service # <-- To start the service -
Check if the service run correctly
$ sudo systemctl status wg-dashboard.serviceAnd you should see something like this
● wg-dashboard.service
     Loaded: loaded (/etc/systemd/system/wg-dashboard.service; enabled; vendor preset: enabled)
     Active: active (running) since Tue 2021-08-03 22:31:26 UTC; 4s ago
   Main PID: 6602 (python3)
      Tasks: 1 (limit: 453)
     Memory: 26.1M
     CGroup: /system.slice/wg-dashboard.service
             └─6602 /usr/bin/python3 /root/wireguard-dashboard/src/dashboard.py

Aug 03 22:31:26 ubuntu-wg systemd[1]: Started wg-dashboard.service.
Aug 03 22:31:27 ubuntu-wg python3[6602]:  * Serving Flask app "Wireguard Dashboard" (lazy loading)
Aug 03 22:31:27 ubuntu-wg python3[6602]:  * Environment: production
Aug 03 22:31:27 ubuntu-wg python3[6602]:    WARNING: This is a development server. Do not use it in a production deployment.
Aug 03 22:31:27 ubuntu-wg python3[6602]:    Use a production WSGI server instead.
Aug 03 22:31:27 ubuntu-wg python3[6602]:  * Debug mode: off
Aug 03 22:31:27 ubuntu-wg python3[6602]:  * Running on all addresses.
Aug 03 22:31:27 ubuntu-wg python3[6602]:    WARNING: This is a development server. Do not use it in a production deployment.
Aug 03 22:31:27 ubuntu-wg python3[6602]:  * Running on http://0.0.0.0:10086/ (Press CTRL+C to quit)
If you see
Active:followed byactive (running) since...then it means it run correctly. -
Stop/Start/Restart the service
$ sudo systemctl stop wg-dashboard.service # <-- To stop the service $ sudo systemctl start wg-dashboard.service # <-- To start the service $ sudo systemctl restart wg-dashboard.service # <-- To restart the service -
And now you can reboot your system, and use the command at step 6 to see if it will auto start after the reboot. If you have any questions or problem, please report it in the issue page.
✂️ Dashboard Configuration
Dashboard Configuration file
Since version 2.0, Wireguard Dashboard will be using a configuration file called wg-dashboard.ini, (It will generate automatically after first time running the dashboard). More options will include in future versions, and for now it included the following config:
| Description | Default Value | |
|---|---|---|
[Account] |
||
username |
Dashboard login username | admin |
password |
Password, will be hash with SHA256 | admin hashed in SHA256 |
[Server] |
||
wg_conf_path |
The path of all the Wireguard configurations | /etc/wireguard |
app_ip |
IP address the dashboard will run with | 0.0.0.0 |
app_port |
Port the the dashboard will run with | 10086 |
auth_req |
Does the dashboard need authentication to access | true |
If auth_req = false , user will not be access the Setting tab due to security consideration. User can only change the file directly in system. |
||
version |
Dashboard Version | N/A |
Latest Version: V2.2
All these settings will be able to configure within the dashboard in Settings on the sidebar, without changing the actual file. Except version and auth_req due to security consideration.
Generating QR code and peer configuration file (.conf)
Starting version 2.2, dashboard can now generate QR code and configuration file for each peer. Here is a template of what each QR code encoded with and the same content will be inside the file:
[Interface]
PrivateKey = QWERTYUIOPO234567890YUSDAKFH10E1B12JE129U21=
Address = 0.0.0.0/32
DNS = 1.1.1.1

[Peer]
PublicKey = QWERTYUIOPO234567890YUSDAKFH10E1B12JE129U21=
AllowedIPs = 0.0.0.0/0
Endpoint = 0.0.0.0:51820
| Description | Default Value | |
|---|---|---|
[Interface] |
||
PrivateKey |
The private key of this peer | N/A |
Address |
The allowed_ips of your peer |
N/A |
DNS |
The DNS server your peer will use | 1.1.1.1 - Cloud flare DNS, you can change it when you adding the peer or in the peer setting. |
[Peer] |
||
PublicKey |
The public key of your server | N/A |
AllowedIPs |
IP ranges for which a peer will route traffic | 0.0.0.0/0 - Indicated a default route to send all internet and VPN traffic through that peer. |
Endpoint |
Your wireguard server ip and port, the dashboard will search for your server's default interface's ip. | <your server default interface ip>:<listen port> |
❓ How to update the dashboard?
- Change your directory to
wireguard-dashboard$ cd wireguard-dashboard - Get the newest version
$ sudo git pull https://github.com/donaldzou/wireguard-dashboard.git v2.2 --force - Update and install all python dependencies
$ python3 -m pip install -r requirements.txt - Start the dashboard
$ ./wgd.sh start
🔍 Screenshot

Sign In
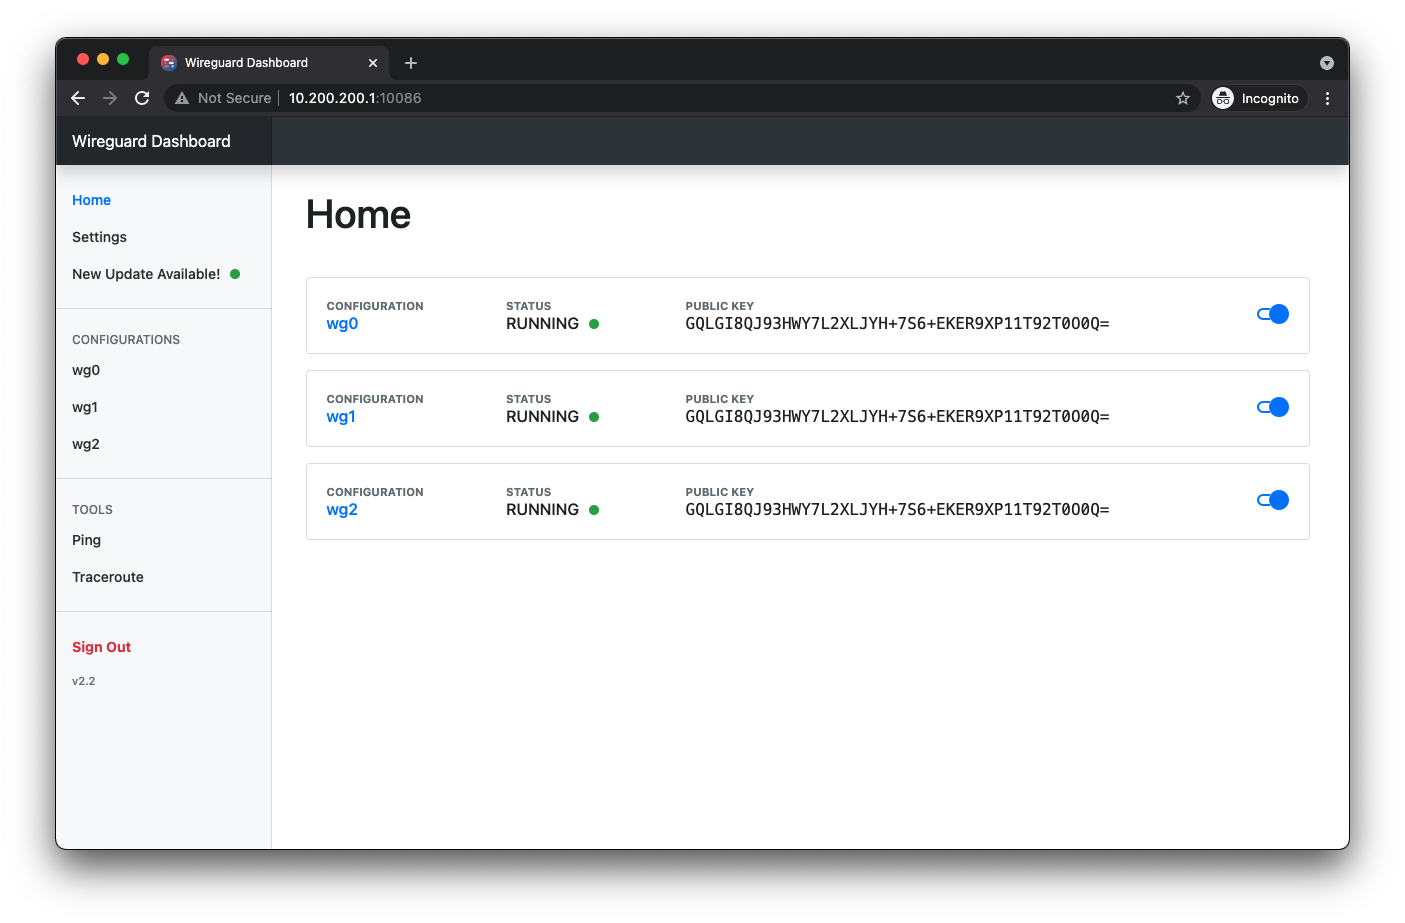
Home
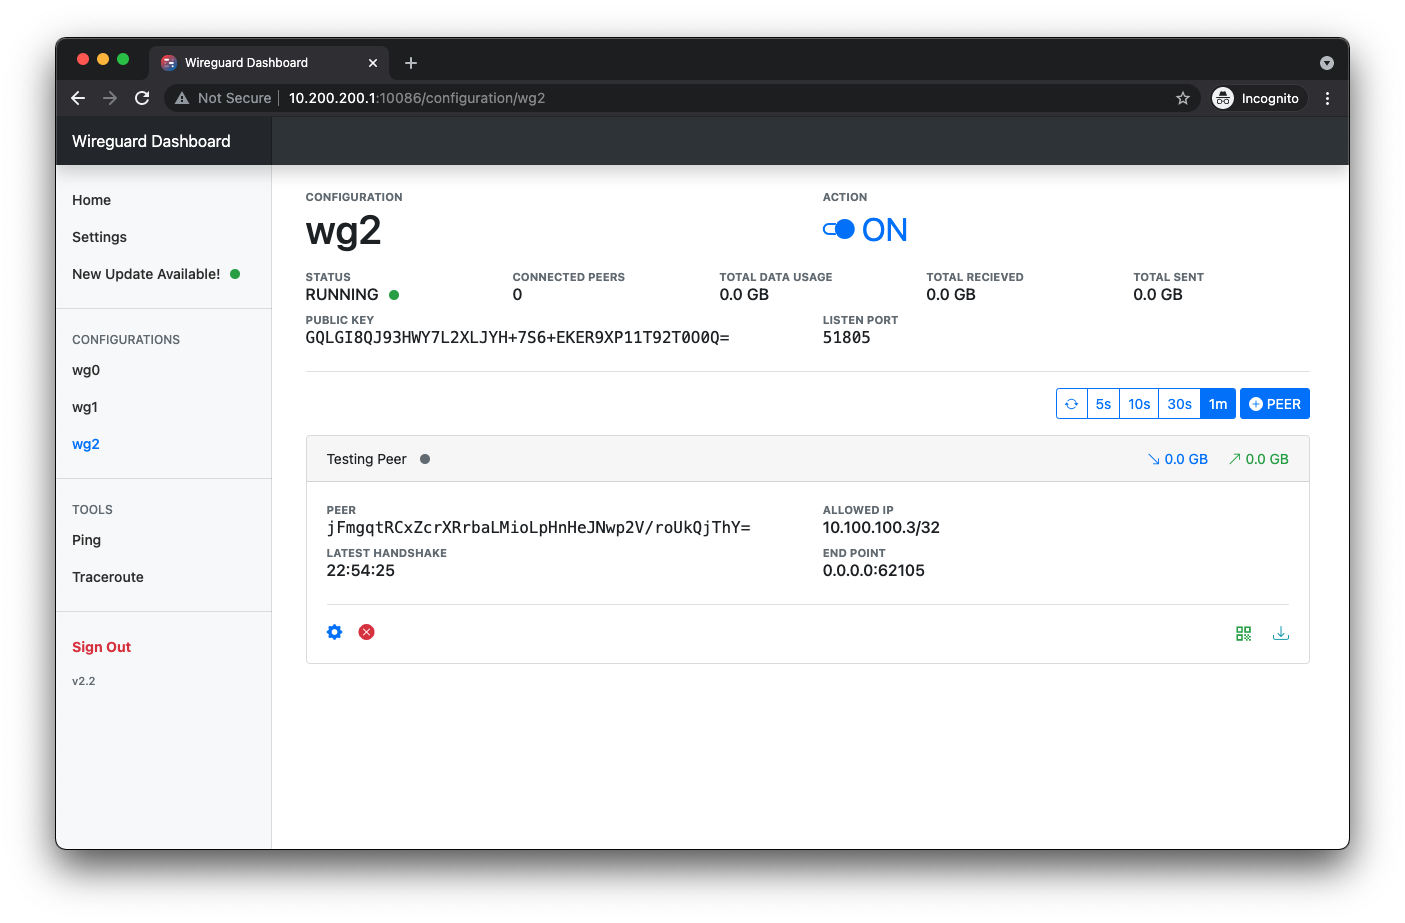
Configuration
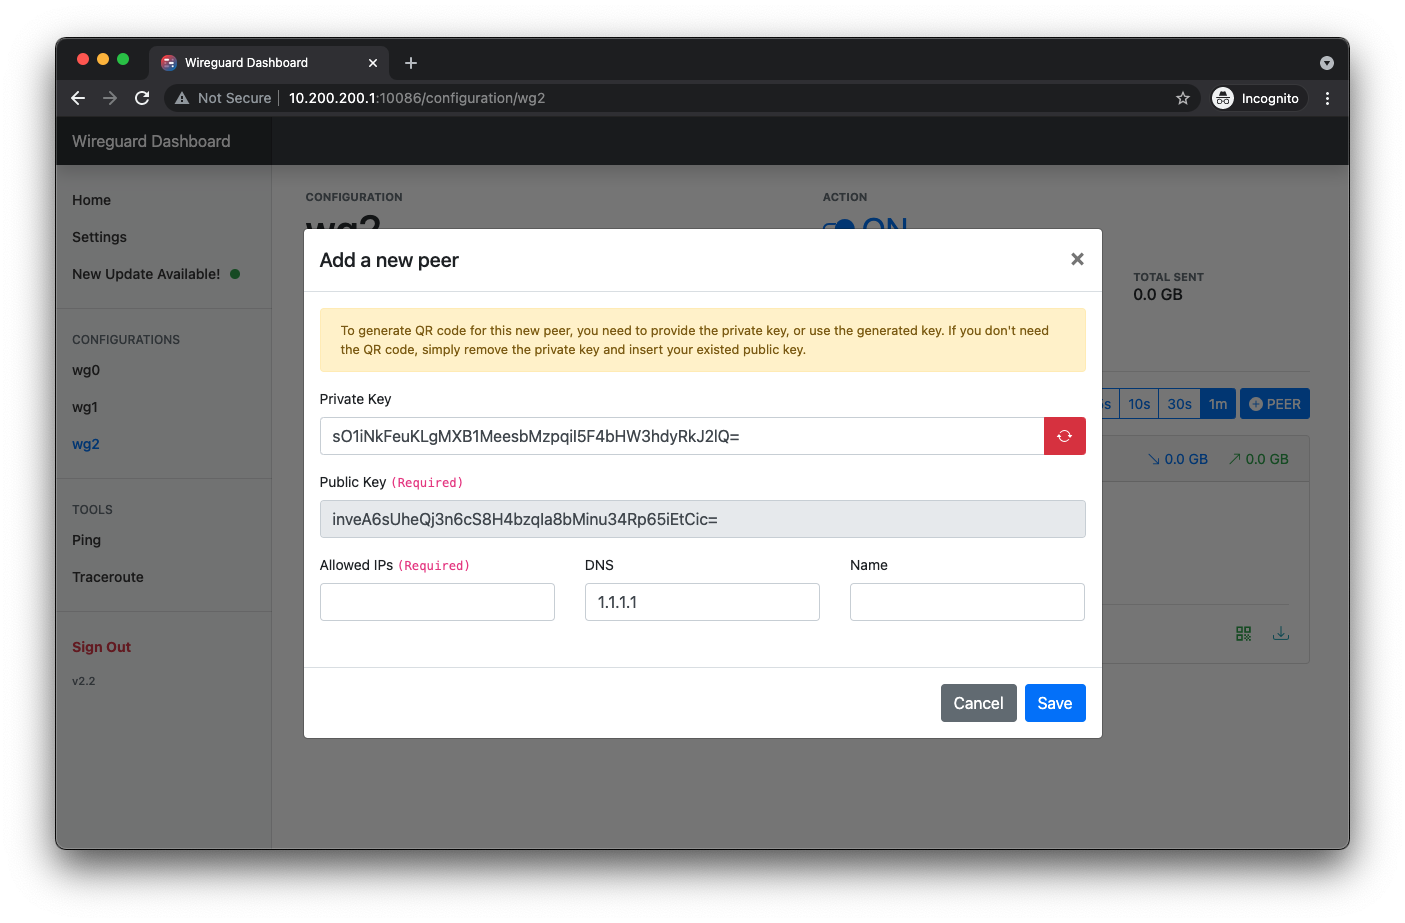
Add Peer
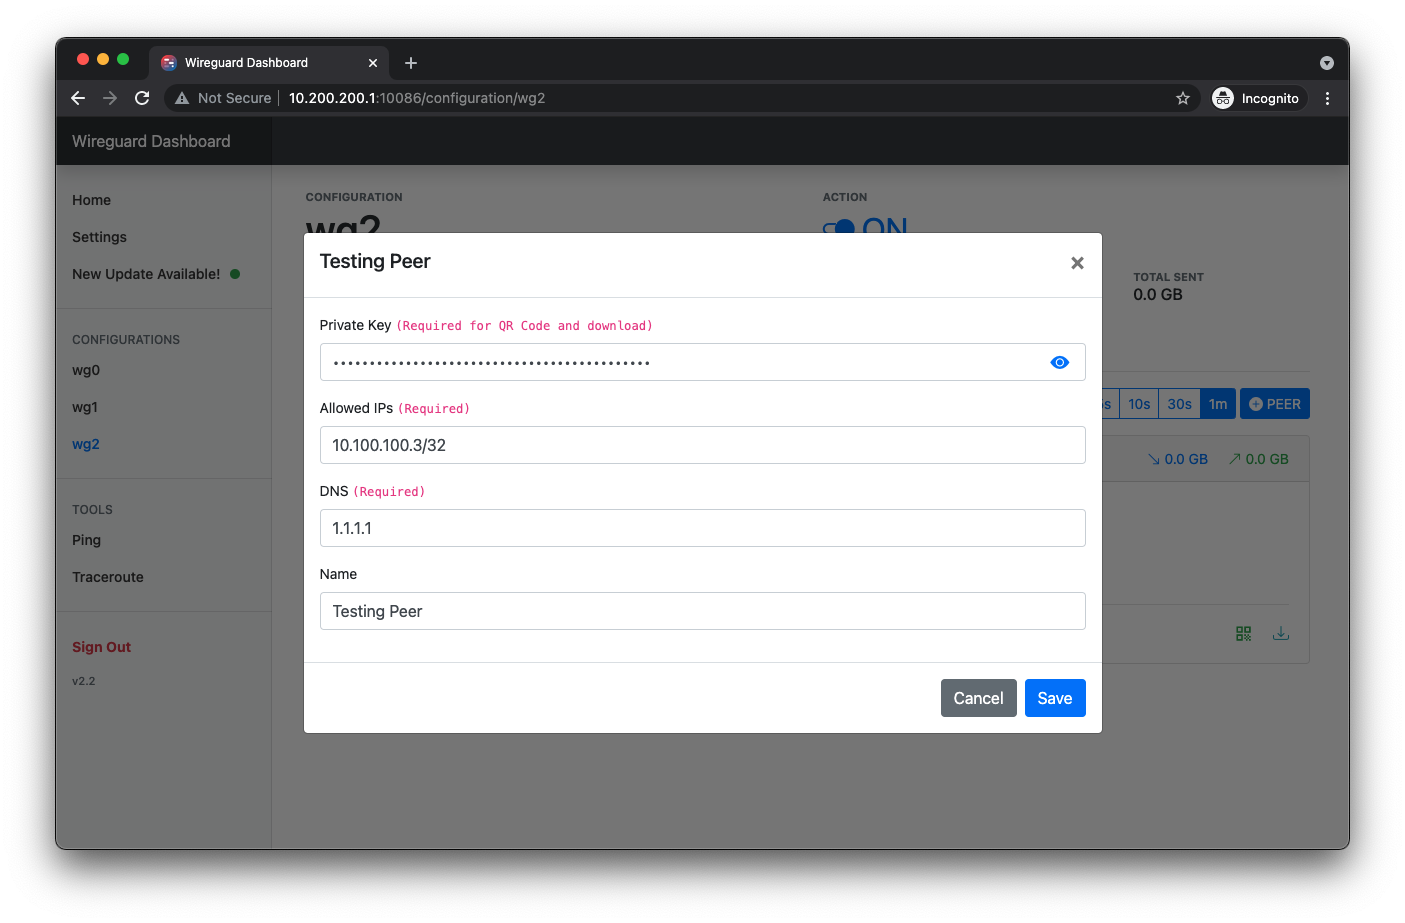
Edit Peer

Delete Peer
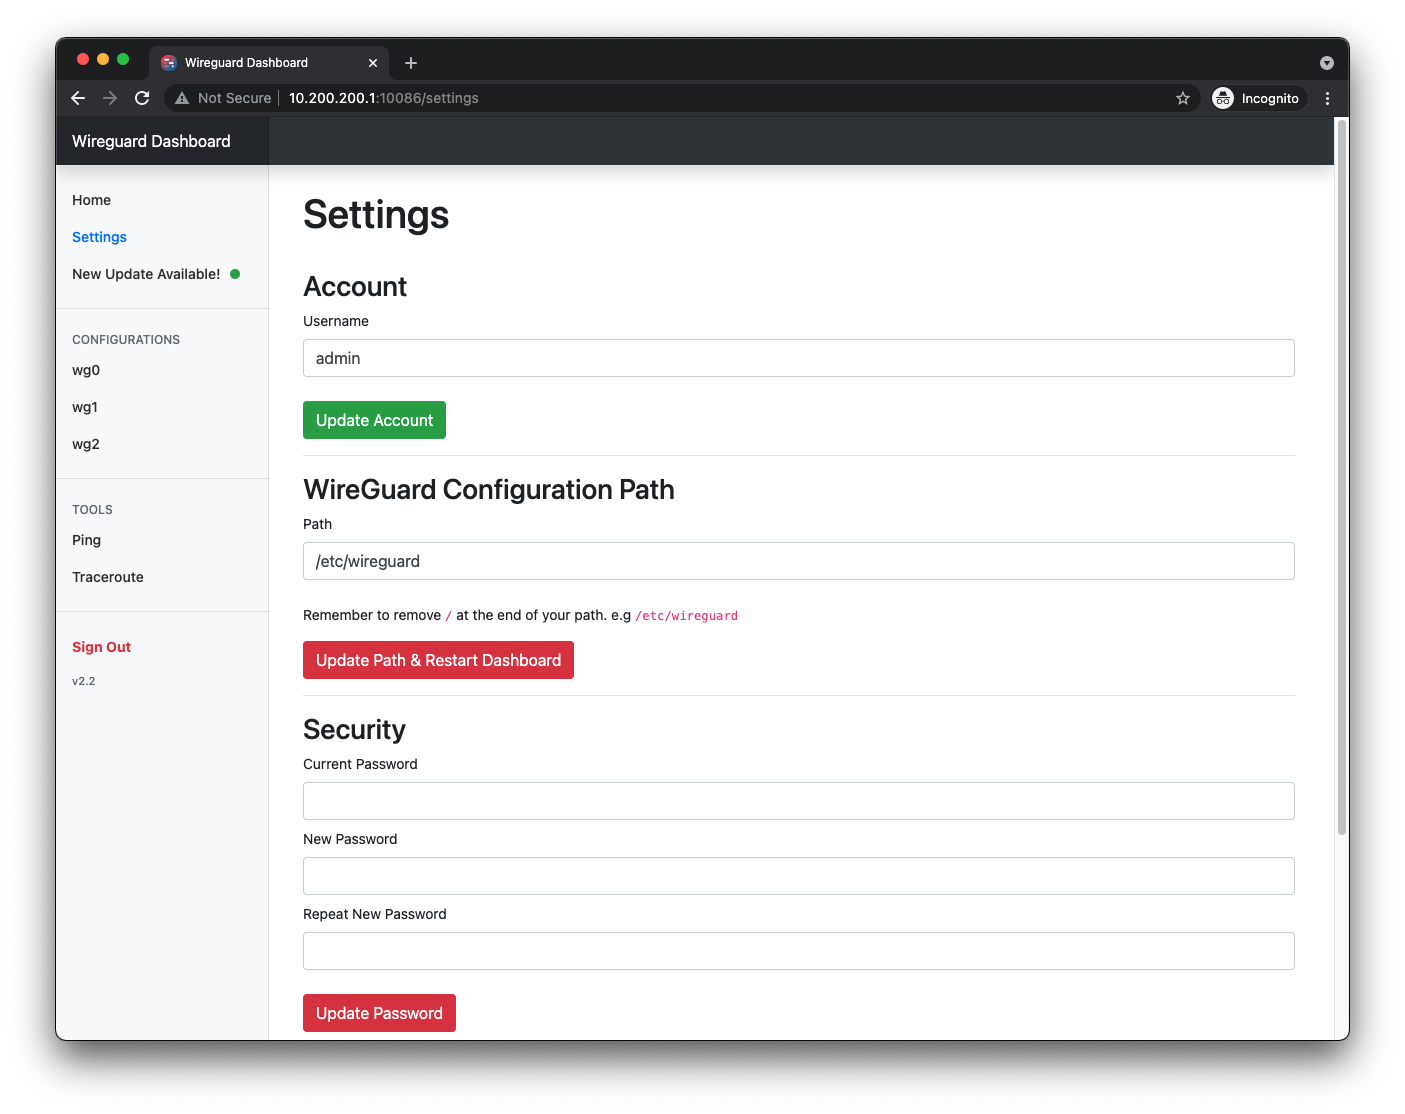
Dashboard Setting
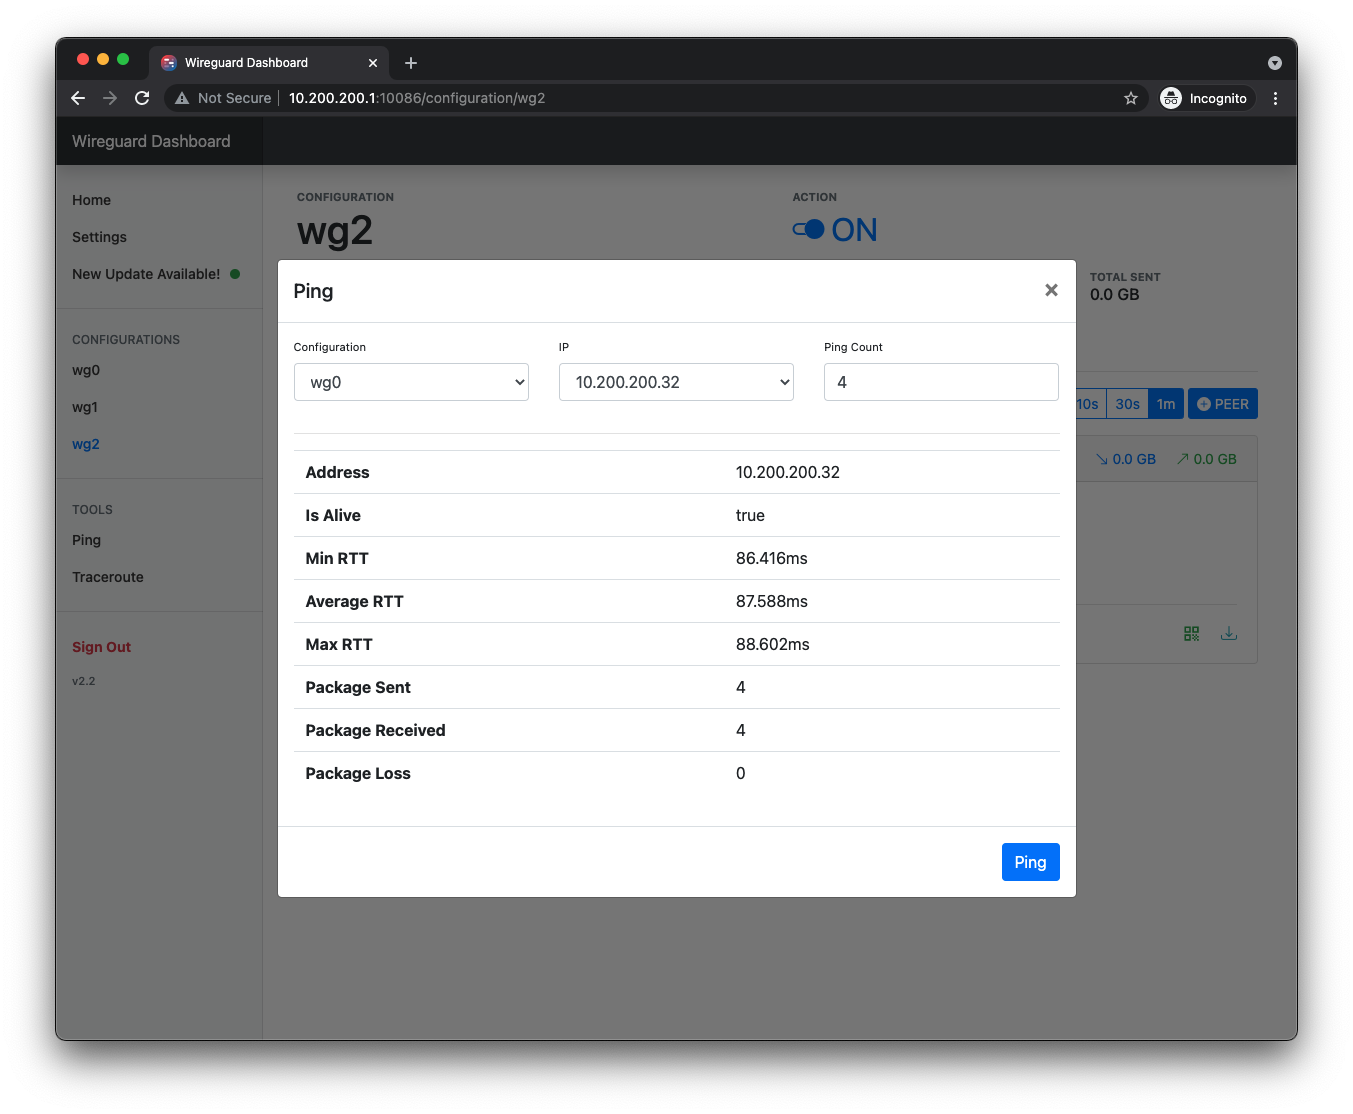
Ping
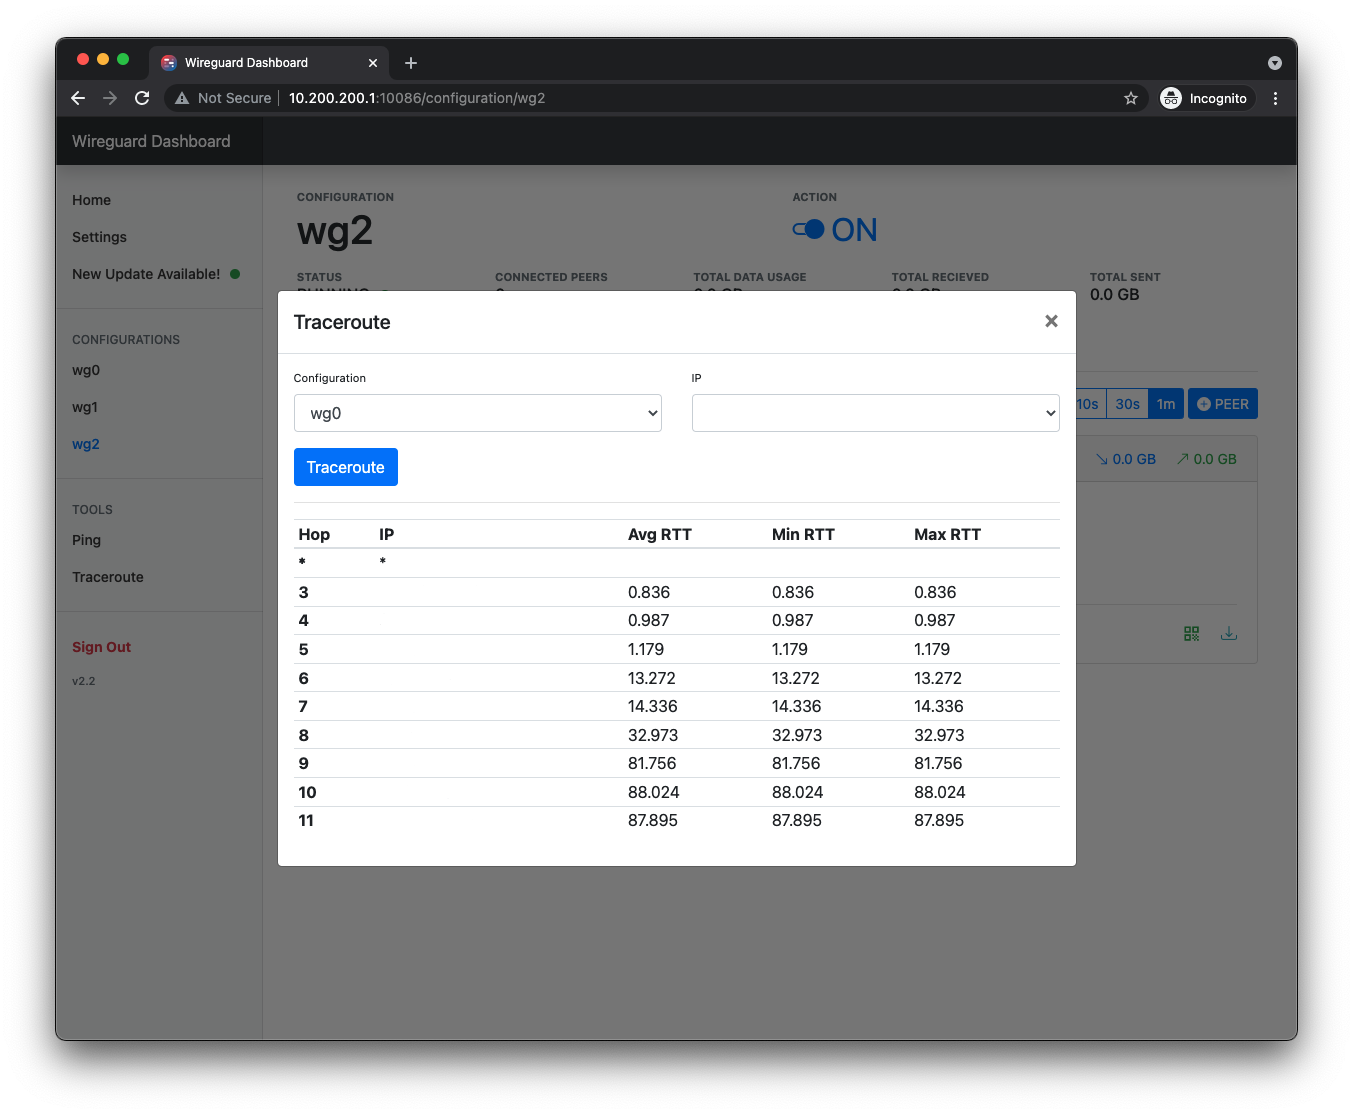
Traceroute
⏰ Changelog
v2.1 - Jul 2, 2021
- Added Ping and Traceroute tools!
- Adjusted the calculation of data usage on each peers
- Added refresh interval of the dashboard
- Bug fixed when no configuration on fresh install (#23)
- Fixed crash when too many peers (#22)
v2.0 - May 5, 2021
- Added login function to dashboard
- I'm not using the most ideal way to store the username and password, feel free to provide a better way to do this if you any good idea!
- Added a config file to the dashboard
- Dashboard config can be change within the Setting tab on the side bar
- Adjusted UI
- And much more!
v1.1.2 - Apr 3, 2021
- Resolved issue #3.
v1.1.1 - Apr 2, 2021
- Able to add a friendly name to each peer. Thanks #2 !
v1.0 - Dec 27, 2020
- Added the function to remove peers
🛒 Dependencies
- CSS/JS
- Bootstrap
v4.6.0 - Bootstrap Icon
v1.4.0 - jQuery
v3.5.1
- Bootstrap
- Python
✨ Contributors
![]()
Thanks goes to these wonderful people (emoji key):
 antonioag95 ⚠️ 💻 |
 tonjo 💻 |
This project follows the all-contributors specification. Contributions of any kind welcome!